
DIY Earring Holder
I have been searching for an earring holder for quite some time now. Nothing ever really caught my eye. My mom bought one from the Saturday Market but it was $25. That just seemed a little too pricey from me. After walking around the craft store for a few hours, my mom and I, came up with an idea. The total amount for my project was about 10 dollars.
What you need:
8x10 Picture Frame $5.99 (Any size picture frame will actually work. I got mine on clearance at Michael's.)
Plastic Canvas $0.59 (Used for yarn crafts. Check yarn section at craft store. They carry a lot of colors.)
1 1/3 yards of ribbon. $2.66 (At Jo-Ann Fabrics, they have yarn sold by the yard. This ribbon was 1.99 a yard.)
Tacky Glue or Super Glue
Scissors
Optional:
Hooks $1.18 (Any hooks you want. Mine are from Home Depot)

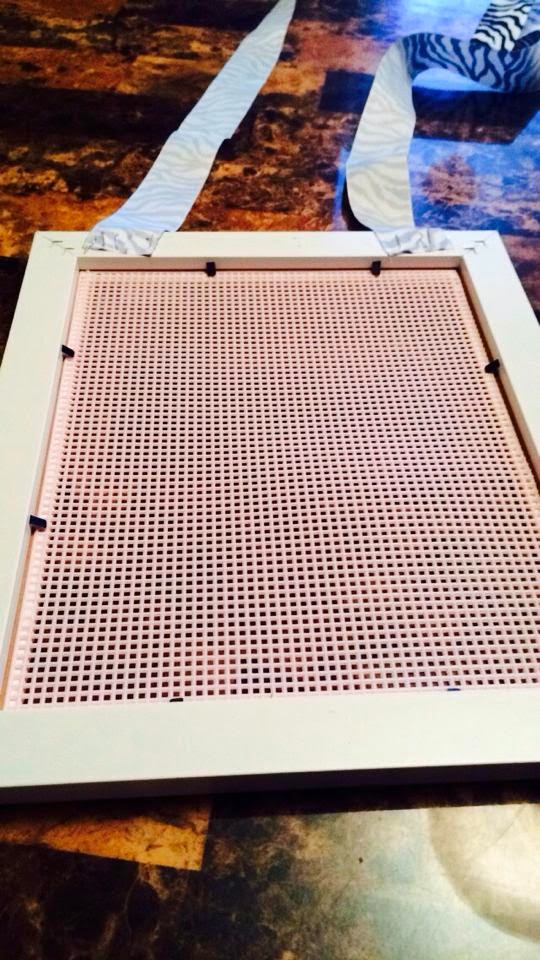 First, Take the cardboard backing and glass out of the picture frame. Cut the plastic canvas to fit the frame then, glue the canvas to it. The canvas is really tricky to glue onto so beware of that. Let it dry for quite some time before doing anything else.
After it is completely dry, glue the ribbon on the back of the frame. Make sure the length is even on both sides so you can tie it in a bow. Glue each end of the ribbon on the frame. Let that dry completely before tying the bow. Tie the bow then, hang on the wall with a nail or tacks. Take the hooks and place them in between the ribbon in frame. I hung my rings on the hooks.


VIOLA!
Hang your earrings and rings up and then you have an adorable ring and earring holder! This is probably one of my favorite crafts that I have done.
Now to enjoy a glass of wine with all this crafting I'm doing :)

No comments:
Post a Comment